

Vaccination Technique

Author: Mary Rowe, Zoetis
Stock Journal Feature Article - May 2024
With lambing marking starting shortly it is timely to revisit the importance of vaccination techniques and best practice vaccine handling. Lambs are born without existing immunity and rely on the provision of antibodies through colostrum to provide protection for the first 6-8 weeks of life. This protects the lamb from disease until its own immune system becomes fully active, and the lamb can be vaccinated. Lambs vaccinated at marking and given a second dose at weaning develop good active immunity. This is important for protection against disease such as arthritis, pulpy kidney and tetanus.
When lambs are given their first dose of vaccine the animal is provided with a small amount of short-term protection. It is after the animal is given the second dose of vaccine that the immune system is capable of providing protection against disease, in most cases for 12 months. Thereafter annual booster sustain this immune response.
Before commencing lamb marking vaccination ensure you have the correct equipment. For sheep vaccines use a clean, accurate vaccinator of an appropriate size, generally this is a 1ml quickshot. You can check the accuracy of your vaccinator by running water through the applicator and counting the number of doses into a measuring flask. Always use 6mm (1/4”) 18G needle. Subcutaneous vaccines are best given under the skin on the side of the neck, approximately 50mm down from the ear, on the side of the neck. See Figure 1. Diagram highlighting correct vaccination site. Studies have shown 12mm (½”) needles will likely puncture the muscle and increase the risk of damage to the carcase.
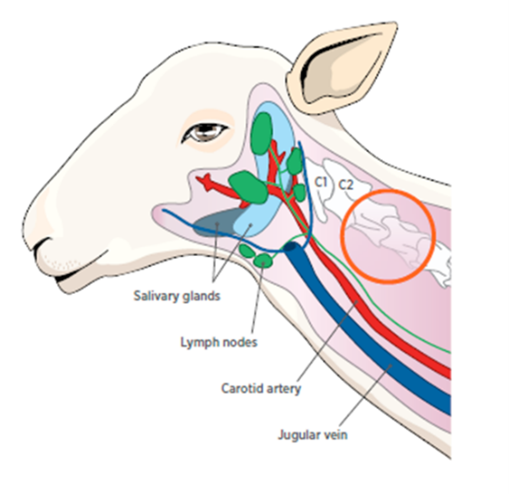
Figure 1. Diagram highlighting correct vaccination site.
Hygiene during vaccination is important. Ideally avoid vaccinating animals that are wet. A new draw-off tube should be used for each pack of vaccine and the rubber stopper should be wiped with an appropriate disinfectant, such as methylated spirits, prior to perforation. If perforating the vaccine pack bung, prior to connecting a draw-off tube, use a new needle. If you find some draw-off tubes difficult to connect to the vaccinator plan to take a thermos of hot water for softening the tube prior to connection. Remember to gently agitate packs of vaccine prior to and occasionally during use to prevent settling of vaccine components. Needles should be changed every 50 animals or if the needle becomes damaged, burred or bent. It is a good idea to have a sharps container handy for disposing of used needles.
Shrouded vaccinators provide an additional level of user safety. See Figure 2. Safeshot Vaccinator. These applicators work by self-tenting the skin when vaccinating at a 45 degree angle. Shrouded applicators improve animal welfare by protecting the needle and reduce the risk of accidental human injection without compromising efficiency. During vaccination it is important to continue storing vaccine appropriately. For the packs of vaccine in use it is advisable to insert the pack into a vaccine pouch. This keeps it out of direct sunlight and slows the heating process. During lunch breaks ect. the vaccine should be returned to an esky with ice bricks. Packs of vaccine not yet in use should be kept in the fridge or in an esky.
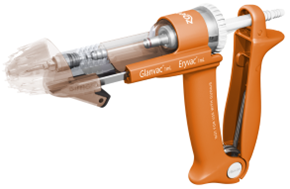
Figure 2. Safeshot Vaccinator
After vaccination or at the end of every day of use clean your applicators. Vaccine residues or vaccine left in a vaccinator, even overnight, may also damage seals making the plunger hard to push and slow to refill or result in blocked valves, all resulting in inaccurate dosing. Follow the manufacturers recommendations on applicator cleaning and maintenance. Vaccine applicators should be dismantled, cleaned and rinsed with clean water as soon as possible after use. Mild detergent may be used but be sure to thoroughly rinse afterwards. Lubricate applicators after cleaning as per the manufacturer’s guidelines.